How to make APIs with Spring Boot: read from a MySQL database
Before we start coding
TL;DR
- Make a database
- Connect database to our project
- Use GET calls to read from SQL database with Spring Boot
- Source code on Github
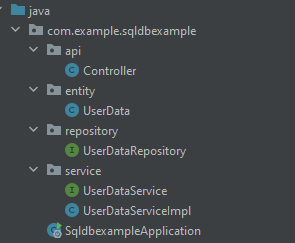
- Architecture:
For any questions you can ask me on Twitter @ tekbog
Set up the database (and make sure it's running)
In my case I'm gonna use MySQL Workbench to create a database called "mydb" and then add a table called "my_table"
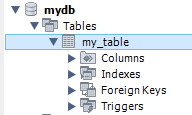
Once that's done run this query to put some data in your database:
USE mydb;

CREATE TABLE my_table
(
    id INT NOT NULL AUTO_INCREMENT PRIMARY KEY,
    name VARCHAR(255) NOT NULL,
    email VARCHAR(255) NOT NULL
);

INSERT INTO my_table (name, email) VALUES ("random_name", "random@random.com");
INSERT INTO my_table (name, email) VALUES ("random_name1", "random1@random.com");
INSERT INTO my_table (name, email) VALUES ("random_name2", "random2@random.com");
Starting with Spring Boot
Connect your database to the Spring Boot app by changing
application.properties
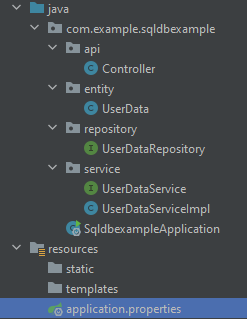
The port is default, make sure it's the same. You can check the port number when you start the Spring Boot app.
 The username and password pertain to your MySQL database.
spring.datasource.url=jdbc:mysql://localhost:3306/mydb
spring.datasource.username=root
spring.datasource.password=password
And the dependencies are:
    <dependencies>
        <dependency>
            <groupId>org.springframework.boot</groupId>
            <artifactId>spring-boot-starter-data-jpa</artifactId>
        </dependency>
        <dependency>
            <groupId>org.springframework.boot</groupId>
            <artifactId>spring-boot-starter-jdbc</artifactId>
        </dependency>
        <dependency>
            <groupId>org.springframework.boot</groupId>
            <artifactId>spring-boot-starter-web</artifactId>
        </dependency>

        <dependency>
            <groupId>mysql</groupId>
            <artifactId>mysql-connector-java</artifactId>
            <scope>runtime</scope>
        </dependency>

        <dependency>
            <groupId>org.projectlombok</groupId>
            <artifactId>lombok</artifactId>
            <optional>true</optional>
        </dependency>

        <dependency>
            <groupId>org.springframework.boot</groupId>
            <artifactId>spring-boot-starter-test</artifactId>
            <scope>test</scope>
        </dependency>

    </dependencies>
You can use Spring Initializr as well to set up your project, it's highly recommended.
Postman
In order to make calls to the server I'm going to be using Postman Although there are many alternatives.
Architecture and code
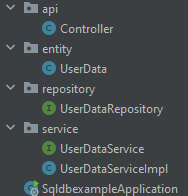 The "folders" are called packages, once you create them: inside you can make classes, interfaces, etc.
Entity
UserData class makes it possible to interact with the database
package com.example.sqldbexample.entity;


import lombok.Getter;

import javax.persistence.*;

//lombok getter so we don't have to write getters
@Getter
//The entity interacts with the database
@Entity
@Table(name = "my_table")
public class UserData {
    //an id is always needed to index the data
    //the annotation GeneratedValue allows the data to be generated automatically
    //and we add the name of the columns where the data goes
    @Id
    @GeneratedValue(strategy = GenerationType.AUTO)
    @Column(name = "id", nullable = false)
    private Long id;

    @Column(name = "name")
    private String name;

    @Column(name = "email")
    private String email;
}
To begin we import Lombok so we don't have to write the getters for the class. Afterwards we define the class as Entity and map the Java objects to the database we are accessing. The most confused annotation could be GeneratedValue: we always need an id and in this case we made our id to be generated automatically. Spring annotations have the following syntax:
@AnnotationName(parameter="parameter value")
Repository
The Repository interface is a DAO (data access object) bean that simplifies our interaction with SQL thanks to JPA, the interface takes 2 parameters: the type of object and the type of id, after which it will allow you to use its extended methods:
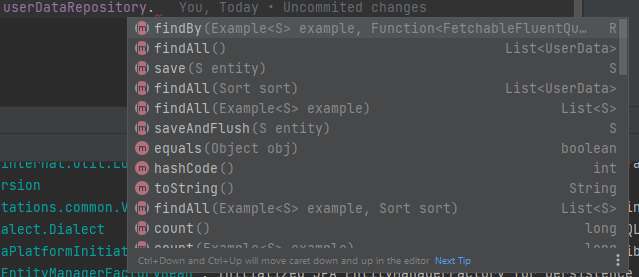
In our case we want to interact with the entity object we have created called UserData and the id is Long type.
Note that Repository annotation also indicates that this is a type of bean we can use anywhere in our project.
package com.example.sqldbexample.repository;

import com.example.sqldbexample.entity.UserData;
import org.springframework.data.jpa.repository.JpaRepository;
import org.springframework.stereotype.Repository;

//repository to interact with the entity
//we use the JpaRepository because of all its methods
@Repository
public interface UserDataRepository extends JpaRepository<UserData, Long> {
}
Service
UserDataService interface is gonna allow us to use the repository we have just created to get the data we want
package com.example.sqldbexample.service;

import com.example.sqldbexample.entity.UserData;

import java.util.List;

//interface to handle the entity UserData
public interface UserDataService {
    List<UserData> getUserData();
}
Now the implementation is as follows:
package com.example.sqldbexample.service;

import com.example.sqldbexample.entity.UserData;
import com.example.sqldbexample.repository.UserDataRepository;
import org.springframework.beans.factory.annotation.Autowired;
import org.springframework.stereotype.Service;

import java.util.List;

@Service
public class UserDataServiceImpl implements UserDataService{

    //get the repository bean
    @Autowired
    UserDataRepository userDataRepository;

    //we use the repository bean to get access to all the methods
    //like findAll
    @Override
    public List<UserData> getUserData() {
        return userDataRepository.findAll();
    }
}
Thanks to the JPA repository we get access to all its methods without having to implement any of them, it just works with our MySQL database. So in order to get all the users from the table we use .findAll() method.
API
You can read my previous article if you are unfamiliar with the Controller
//@RestController annotation will make this class the controller
//meaning that it's listening to htttp://localhost:8080 calls
//and replying with whatever endpoints you have made
@RestController
//localhost:8080/api/v1
@RequestMapping("api/v1")
public class Controller {

    @Autowired
    private UserDataService userDataService;

    @GetMapping("/getdata")
    public List<UserData> getData(){
        return userDataService.getUserData();
    }
}
The main difference is the fact that we add RequestMapping so everything goes to api/v1 path after localhost:port/. Putting the version of your API is good practice.
To sum it up we use the UserDataService bean (service), the Autowired annotation allows us to get the bean through Inversion of Control (Spring magic) and use that interface's implementation without calling it ourselves.
Test that everything works
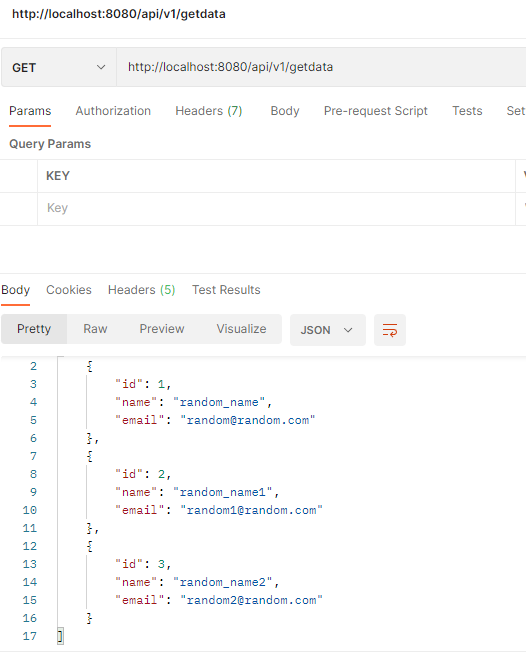
Start the server, make sure your database is running and then using Postman call localhost:8080/api/v1/getdata
you should get this back: